PS5 HDMI Port Replacement – DIY vs Professional Repair

The PlayStation 5 (PS5) has taken the gaming world by storm, delivering stunning graphics and immersive gameplay. However, like any sophisticated technology, it can face issues, particularly with its HDMI port. When the HDMI port fails, it can prevent your console from connecting to the TV, leaving you unable to play your favourite games. This raises an important question: should you attempt a DIY repair, or is it better to seek professional help? In this article, we will explore the considerations for both DIY and professional HDMI port replacement, helping you make an informed decision.
Understanding the HDMI Port Problem
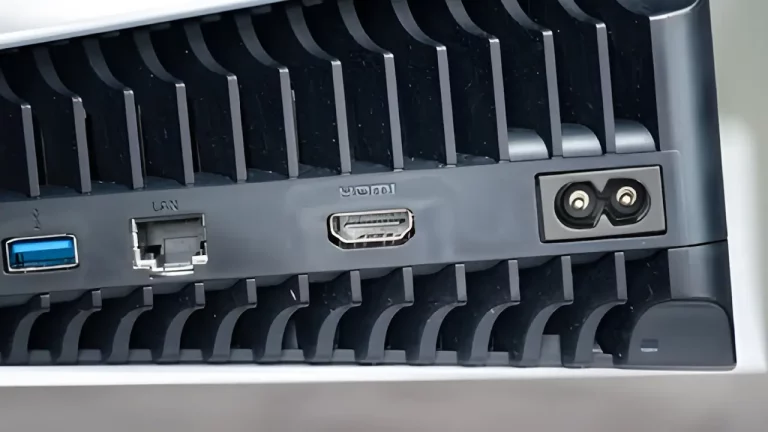
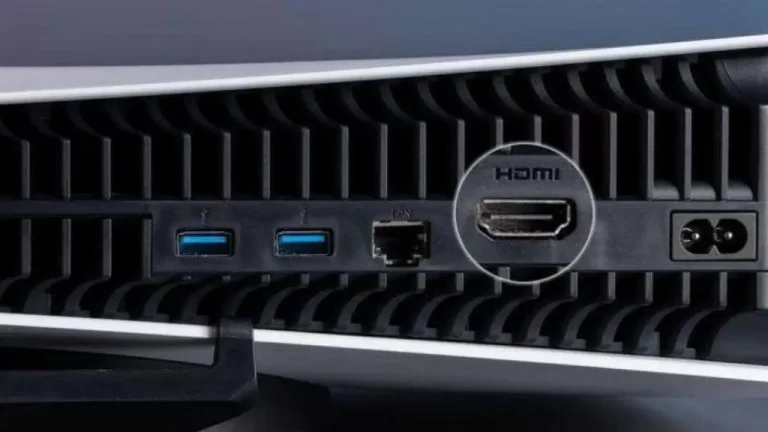
The HDMI port on your PS5 is a crucial component that transmits both video and audio signals to your television. Over time, wear and tear, accidents, or manufacturing defects can lead to issues such as:
- No Signal: The TV displays a “No Signal” message.
- Black Screen: The PS5 powers on, but there’s no visual output.
- Flickering Image: The display may flicker or show artefacts during gameplay.
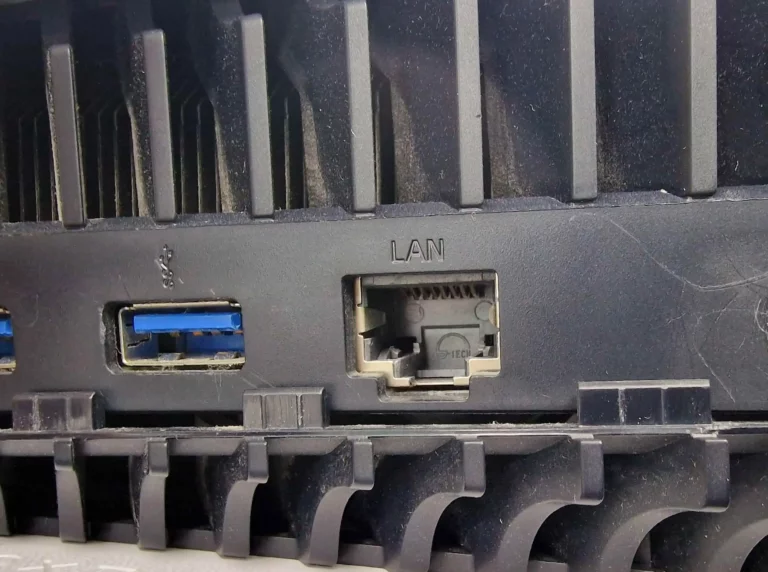
- Loose Connection: The HDMI cable may not fit snugly, causing intermittent signal loss.
Understanding these problems is the first step in deciding whether to repair the HDMI port yourself or seek professional assistance.
DIY HDMI Port Replacement: Pros and Cons
Pros of DIY Repair
- Cost Savings: One of the most significant advantages of DIY repairs is the potential cost savings. Professional repairs can be expensive, while doing it yourself only requires the cost of parts and tools.
- Learning Experience: Engaging in a DIY repair can be a valuable learning experience. You’ll gain insights into how the PS5 works and improve your technical skills, which can be beneficial for future repairs.
- Convenience: With a DIY approach, you can work on your console at your own pace and schedule. You won’t need to wait for an appointment or shipping time, allowing you to get back to gaming more quickly.
Cons of DIY Repair
- Risk of Further Damage: If you’re not familiar with electronics repair, you run the risk of causing additional damage to your PS5. Mistakes can lead to more costly repairs or even render the console unusable.
- Time-Consuming: DIY repairs can take a significant amount of time, especially if you’re unfamiliar with the process. Researching, disassembling the console, and reassembling it can be a lengthy task.
- Warranty Concerns: If your PS5 is still under warranty, attempting a DIY repair may void it. Always check your warranty terms before proceeding with repairs.
Professional HDMI Port Replacement: Pros and Cons
Pros of Professional Repair
- Expertise: Professional technicians have the experience and expertise to handle HDMI port replacements efficiently. They’re familiar with common pitfalls and can diagnose issues quickly.
- Quality Assurance: When you opt for professional repair, you can usually expect a warranty on the service. This means if something goes wrong after the repair, you have protection.
- Less Stress: By hiring a professional, you can avoid the stress and frustration that often come with DIY repairs. You can simply drop off your console and wait for it to be repaired.
Cons of Professional Repair
- Higher Cost: Professional repairs can be significantly more expensive than doing it yourself. Depending on the extent of the damage, repair costs can add up quickly.
- Waiting Time: Depending on the repair shop’s workload, you may have to wait for your console to be serviced. This waiting period can be frustrating, especially if you’re eager to get back to gaming.
- Limited Control: When you hand your console over to a repair shop, you relinquish control over the repair process. If you prefer a hands-on approach, this can be a drawback.
How to Determine the Best Option for You
Assess Your Skills
Before deciding on a DIY repair, assess your technical skills and comfort level with electronics. If you have experience with soldering and disassembling devices, you may feel more confident in attempting the repair yourself. However, if you’re a novice, it might be wiser to seek professional help.
Evaluate the Cost
Compare the costs associated with DIY repairs versus professional repairs. DIY repairs require purchasing tools and replacement parts, which can add up. On the other hand, professional services may charge a premium. Consider your budget and weigh the potential savings against the risks involved.
Consider Time and Convenience
Reflect on how much time you can dedicate to the repair. If you have a busy schedule or limited time to spare, opting for professional repair may be more convenient. Conversely, if you have the time to spare and enjoy hands-on projects, DIY may be the way to go.
Check the Warranty
If your PS5 is still under warranty, it’s crucial to understand the implications of performing a DIY repair. Attempting to fix the HDMI port yourself may void the warranty, leaving you without support if something goes wrong. Always check the terms of your warranty before proceeding.
Steps for DIY HDMI Port Replacement
If you decide to proceed with a DIY repair, follow these steps carefully:
Step 1: Gather the Necessary Tools
You will need the following tools and materials:
- Screwdrivers: A set of precision screwdrivers (Phillips and flathead).
- Soldering Kit: For desoldering and soldering the HDMI port.
- Replacement HDMI Port: Ensure you purchase a high-quality replacement part. Refer to our guide on DIY vs. Professional Repairs: What You Need to Know for tips on sourcing parts.
- Tweezers: For handling small components.
- ESD Strap: To prevent static damage.
Step 2: Disassemble the PS5
- Power Off: Ensure your PS5 is completely powered off and unplugged.
- Remove the Covers: Carefully remove the outer shell using your screwdrivers. Keep track of the screws to avoid losing them.
- Locate the HDMI Port: Once inside, identify the HDMI port and take note of how it is connected to the motherboard.
Step 3: Desolder the Old HDMI Port
- Heat the Soldering Iron: Once your soldering iron is hot, carefully desolder the connections of the old HDMI port. Use your tweezers to hold the port steady.
- Remove the Port: Gently lift the old HDMI port away from the motherboard once the solder has melted.
Step 4: Install the New HDMI Port
- Position the New Port: Align the new HDMI port with the solder pads on the motherboard.
- Solder the Connections: Carefully solder the connections, ensuring each pin is properly secured.
Step 5: Reassemble the PS5
- Replace the Cover: Once the new port is securely soldered in place, reassemble the PS5 by reversing the disassembly steps.
- Test the Console: Power on your PS5 and check if the HDMI connection works. If successful, congratulations on your DIY repair!
Steps for Professional HDMI Port Replacement
If you decide to go the professional route, follow these guidelines:
Step 1: Find a Reputable Repair Shop
Research local repair shops that specialise in gaming consoles. Look for reviews and testimonials to ensure quality service. Check out our guide on How to Choose the Right Computer Repair Service: A Buyer’s Guide for tips on selecting a reputable service.
Step 2: Assess Costs and Timeframes
Contact the repair shop to get an estimate for the HDMI port replacement. Ask about the expected timeframe for the repair and any warranties offered on the service.
Step 3: Drop Off Your Console
Once you’re satisfied with the estimate, drop off your PS5 at the repair shop. Provide them with any details regarding the issue to ensure they understand what needs fixing.
Step 4: Wait for the Repair
After you’ve handed over your console, wait for the repair to be completed. Use this time to catch up on your gaming or explore new titles!
Step 5: Test the Repair
Once you receive your PS5 back, test the HDMI port thoroughly to ensure it works properly. If you encounter any issues, don’t hesitate to reach out to the repair shop for assistance.
Conclusion
Deciding between a DIY HDMI port replacement and seeking professional repair for your PS5 depends on various factors, including your technical skills, budget, time availability, and warranty considerations. DIY repairs can save money and provide a valuable learning experience but come with risks. Conversely, professional repairs offer expertise and peace of mind at a higher cost.
Ultimately, weigh the pros and cons outlined in this guide to make the best decision for your situation. Regardless of the path you choose, maintaining your PS5’s HDMI port is crucial for an uninterrupted gaming experience.
Summary Table: DIY vs Professional Repair
| Factor | DIY Repair | Professional Repair |
|---|---|---|
| Cost | Generally lower | Generally higher |
| Skill Required | Basic to intermediate | Expert-level |
| Time Investment | Potentially time-consuming | Usually quicker |
| Risk of Damage | Higher risk of further damage | Lower risk of additional issues |
| Warranty Impact | May void warranty | Usually retains warranty |
| Learning Opportunity | Yes | No |
| Quality Assurance | No | Yes |
| Convenience | Flexible, but potentially stressful | Less stress, but limited control |
With this information, you should feel better equipped to tackle any HDMI port issues with your PS5, whether you choose to go the DIY route or enlist the help of a professional.