How to Safely Upgrade Your Laptop’s RAM and Storage
Upgrading your laptop’s RAM (Random Access Memory) and storage can significantly improve its performance, speed, and multitasking capabilities. Whether your laptop has started to feel sluggish or you simply need more space for files and applications, upgrading these components can breathe new life into your machine. However, doing so safely requires a bit of know-how to avoid damaging your device.
In this guide, we will walk you through the process of upgrading your laptop’s RAM and storage, step by step. We’ll also cover the benefits of upgrading, tips on choosing the right components, and precautions to take to ensure a smooth upgrade. By the end of this guide, you’ll have a better understanding of how to perform these upgrades without the risk of damaging your laptop.
Why Upgrade Your Laptop’s RAM and Storage?
Before diving into the upgrade process, it’s essential to understand why upgrading your laptop’s RAM and storage is beneficial. Here are a few reasons:
- Improved Performance: Upgrading RAM can speed up your laptop’s ability to handle multiple applications and improve overall performance, especially with more demanding software.
- Increased Storage Capacity: Upgrading storage allows you to store more files, install larger applications, and have more room for essential data without constantly worrying about running out of space.
- Better Multitasking: More RAM enables your laptop to manage multiple tasks simultaneously, which is crucial if you often have several programs open at once.
- Future-Proofing: Upgrading helps to future-proof your device by extending its usable life, saving you from having to replace it sooner than necessary.
If you’re unsure whether upgrading is the right move, check out The Pros and Cons of Upgrading Your Computer: Is It Worth It?.
Step 1: Check Compatibility
Before purchasing new RAM or storage, you need to confirm what’s compatible with your laptop. Not all laptops can be upgraded, so this step is crucial.
How to Check Your Laptop’s Compatibility
- RAM Compatibility:
- Use tools like Crucial’s System Scanner to identify how much RAM your laptop currently has and how much it can support.
- Check your laptop’s user manual or search online to find out the type of RAM (DDR3, DDR4, etc.) your laptop uses.
- Storage Compatibility:
- Identify whether your laptop uses an HDD (Hard Disk Drive) or an SSD (Solid-State Drive). Many modern laptops use M.2 or NVMe SSDs.
- Check the maximum storage size your laptop can handle.
- Consider whether you want to replace your existing storage or add a secondary drive if your laptop has an extra bay.
For more information on choosing the right laptop components, visit How to Choose the Right Laptop for Your Needs.
Step 2: Back Up Your Data
Whenever you’re performing an upgrade on your laptop, it’s crucial to back up your data. Upgrading storage involves handling sensitive components, and while it’s rare, there’s always a slight chance something could go wrong.
How to Back Up Your Data
- Cloud Backup: Use services like Google Drive, Dropbox, or iCloud to back up essential files.
- External Hard Drive: Transfer files manually to an external hard drive or SSD.
Backing up is especially important if you’re upgrading storage since you may need to reinstall your operating system (OS) on the new drive. For more tips on data protection, check out The Ultimate Guide to Protecting Your Smartphone.
Step 3: Gather the Necessary Tools
Upgrading your laptop’s RAM and storage is usually straightforward, but you’ll need some tools to get started. Here’s a list of essential items:
- Screwdrivers: Laptops typically require a Phillips-head screwdriver to open the back panel.
- Anti-static Wrist Strap: To prevent electrostatic discharge, which can damage your laptop’s components, wear an anti-static wrist strap.
- RAM and Storage Components: Once you’ve confirmed compatibility, purchase the right RAM and storage (SSD or HDD) for your laptop.
You can also refer to DIY vs Professional Repairs: What You Need to Know to decide if upgrading yourself is the best option or whether to seek professional help.
Step 4: Power Down and Disconnect
Before you begin disassembling your laptop, make sure it’s completely powered off and unplugged from any power sources. This step is crucial to avoid electric shock and potential damage to your device.
- Power Off the Laptop: Shut down your laptop properly through the operating system.
- Unplug Everything: Remove the power adapter, any external devices, and peripherals like USB drives or SD cards.
- Remove the Battery (If Applicable): Some laptops have removable batteries. If yours does, remove it before proceeding.
For more safety tips on protecting your laptop from accidental damage, you might want to explore Top 5 Ways to Protect Your Laptop from Physical Damage.
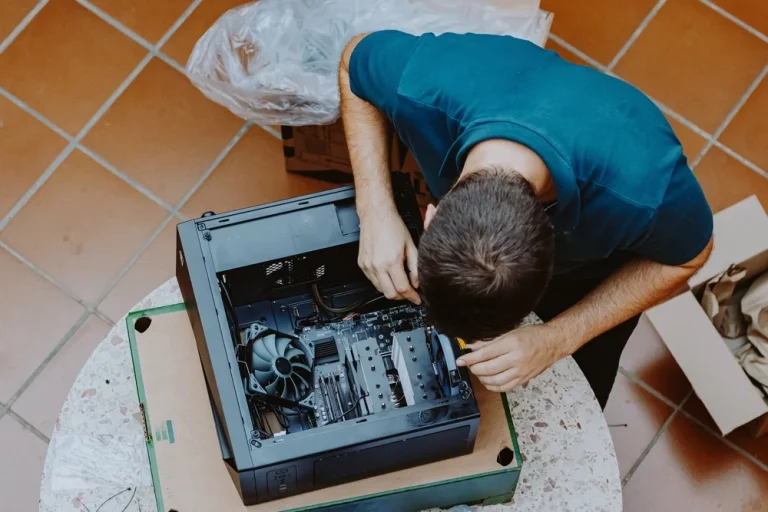
Step 5: Access the Laptop’s Internal Components
With the laptop powered down and disconnected, you can now access the internal components.
How to Open Your Laptop
- Flip the Laptop Over: Place the laptop face down on a clean, static-free surface.
- Locate and Remove Screws: Use the appropriate screwdriver to remove the screws from the back panel of the laptop. Keep the screws safe as you’ll need them to reassemble the laptop.
- Pry Open the Back Panel: Once the screws are removed, carefully use a plastic spudger or your fingers to lift the back panel. Be cautious not to damage any clips or cables.
Note: Some laptops are more complicated to open than others. If you’re unsure, refer to your laptop’s user manual or search for a video tutorial specific to your model.
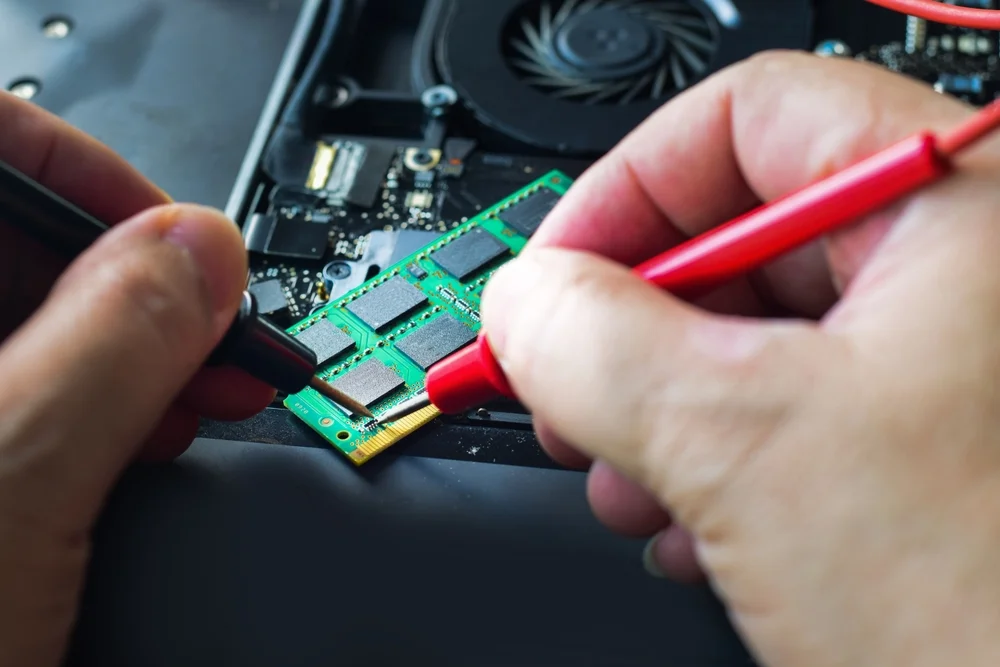
Step 6: Upgrade the RAM
Once the laptop is open, you should be able to see the RAM slots. Most laptops have two slots for RAM modules.
How to Upgrade RAM
- Locate the RAM: Find the RAM modules on the motherboard. They are typically held in place by clips on both sides.
- Remove Old RAM (If Necessary): If you’re replacing old RAM, gently push the clips outward, and the RAM module will pop up. Remove it carefully.
- Insert New RAM: Align the notch on the new RAM module with the slot and gently push it into place. The clips should snap back into position, securing the RAM.
For more tips on maintaining and extending the life of your laptop, visit How to Extend the Life of Your Electronics: Maintenance Tips.
Step 7: Upgrade the Storage
Upgrading storage is a similar process, though it depends on whether you’re upgrading from an HDD to an SSD or replacing an existing SSD.
How to Upgrade Storage
- Locate the Storage Drive: Find the current storage drive, which is typically a 2.5-inch HDD/SSD or an M.2 SSD, depending on your laptop model.
- Remove the Old Drive: If you’re replacing the drive, disconnect the cable (for 2.5-inch drives) or unscrew and remove the M.2 drive.
- Insert the New Drive: Insert your new SSD or HDD into the appropriate slot or bay. Make sure it’s secured by screws or clips.
Tip: If you’re replacing your drive, you will need to reinstall your operating system and transfer your data from the backup.
For more advice on common hardware issues, you can refer to 5 Common Laptop Hardware Issues and How to Fix Them.
Step 8: Reassemble and Power On
Once you’ve successfully installed your new RAM or storage, it’s time to reassemble the laptop.
- Reattach the Back Panel: Carefully snap the back panel into place, ensuring that all clips are aligned.
- Secure the Screws: Replace all the screws you removed earlier and tighten them.
- Reconnect the Battery (If Applicable): If you removed the battery earlier, reconnect it before powering on the laptop.
Step 9: Test the New Components
With everything reassembled, turn on your laptop and ensure that the new components are working correctly.
How to Check Your Upgrade
- Check RAM: On Windows, press
Ctrl + Shift + Escto open Task Manager, then click the “Performance” tab to view your available memory. On macOS, click the Apple menu, select “About This Mac,” and check the Memory section. - Check Storage: Check your available storage by navigating to File Explorer (Windows) or Disk Utility (macOS).
If everything looks good, you’ve successfully upgraded your laptop! If not, consult troubleshooting guides like How to Speed Up a Slow PC: Essential Optimisation Tips.
Conclusion
Upgrading your laptop’s RAM and storage is an effective way to boost its performance and extend its lifespan. By following the steps outlined in this guide, you can perform the upgrade safely and enjoy the benefits of a faster, more responsive laptop.
If you’re ever unsure during the process, consider seeking professional help. The choice between DIY or professional upgrades can be challenging, so check out DIY vs Professional Repairs: What You Need to Know. Happy upgrading.